
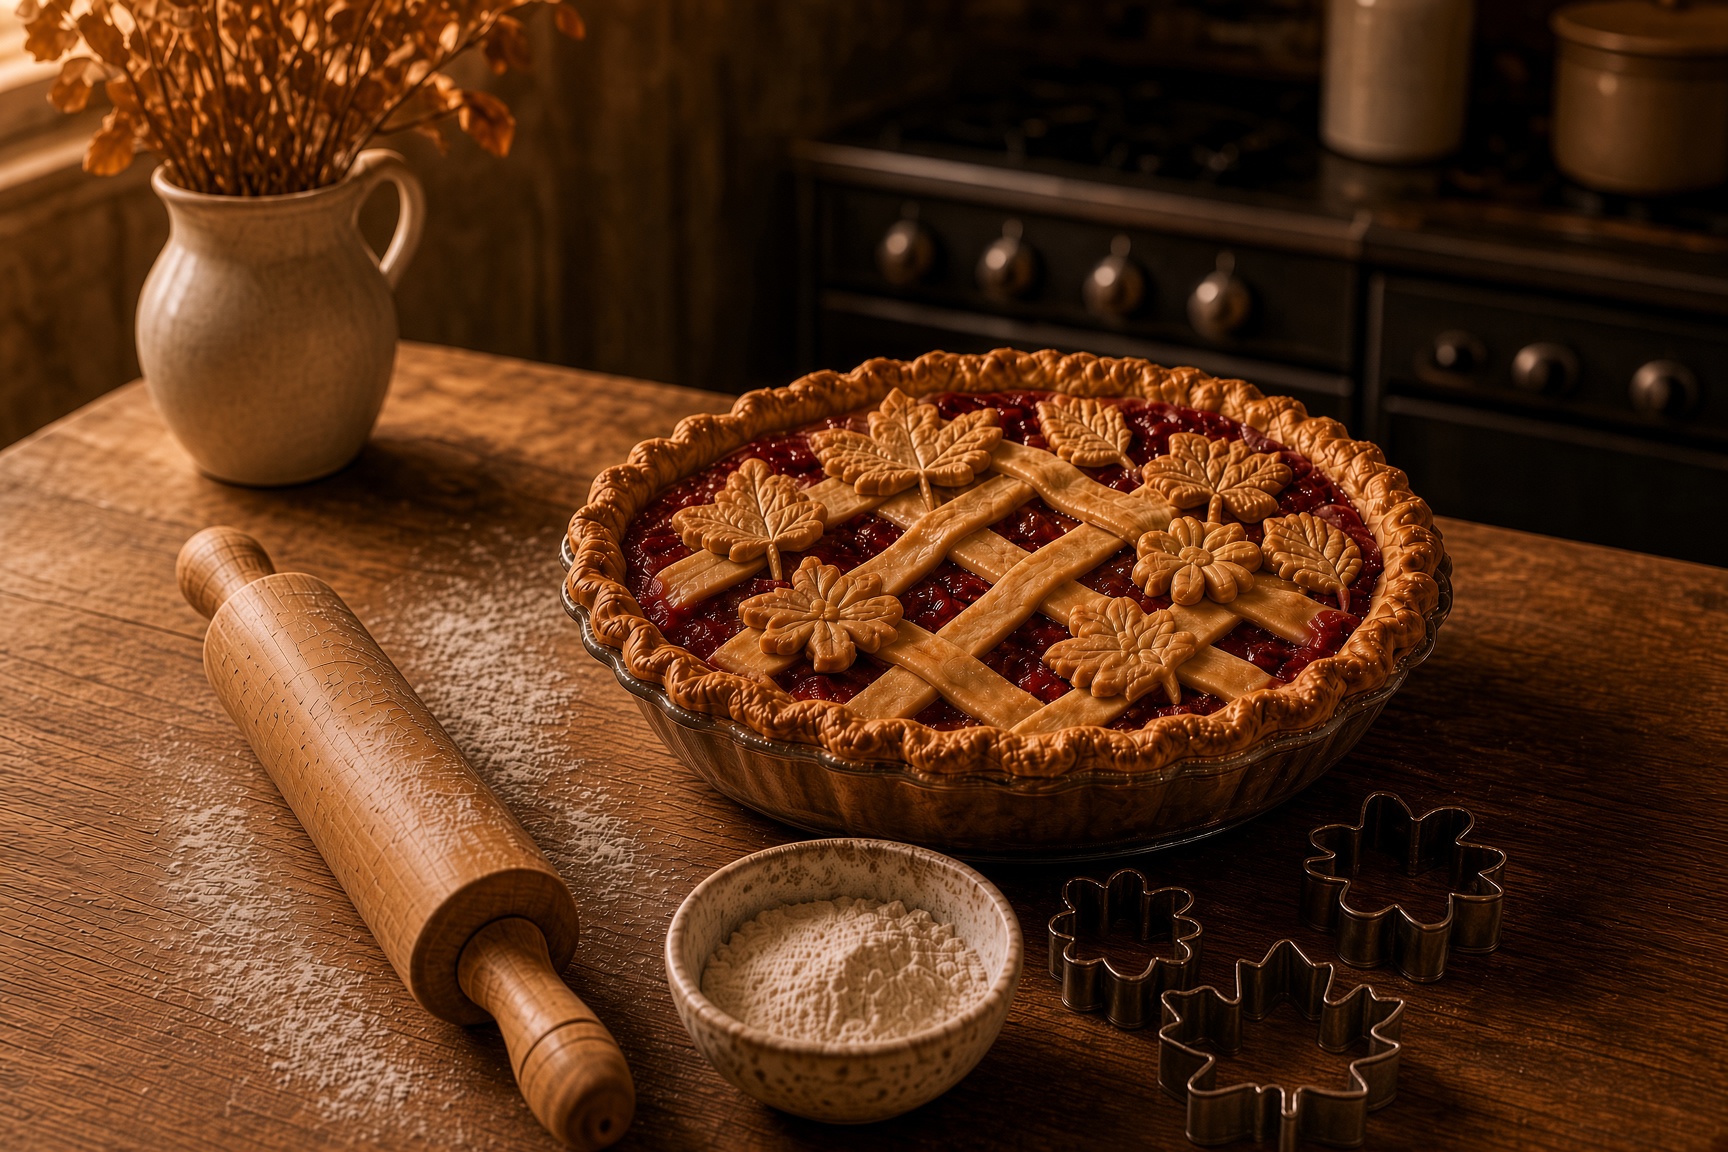
The kitchen is warm. The windows are fogged with steam. And on the counter, a pie is taking shape – not just any pie, but one that looks like it belongs on a magazine cover. The scent of cinnamon and baked fruit fills the air, and the golden crust is dotted with delicate leaves and tiny flowers, each one cut by hand. These beautiful fall pie decorations are easier to create than they look.
It is so satisfying to look at a beautifully decorated pie. Especially the one, that you made yourself. It is the kind of baking that feels like art, but it is much simpler than it looks. With a few basic cookie cutters and a little patience, you can transform a simple fruit pie into something truly special. Beautiful fall pie decorations are the secret to making a dessert that feels both rustic and elegant.
This is the season for apples, blackberries, and pears. The orchards are full, the hedgerows are heavy with fruit, and the kitchen is calling. A pie made with these late-summer and early-fall fruits is the taste of September itself – sweet, slightly tart, and deeply comforting. Adding beautiful fall pie decorations to your crust elevates the entire experience.
If you enjoy baking with seasonal fruit, you might also like our recipe for peach and plum crumble, a simple late-summer dessert HERE.
The filling – a perfect blend of fall fruits
The combination of apples, blackberries, and pears is a classic for good reason. The apples bring sweetness and structure, the pears add a soft, almost buttery texture, and the blackberries offer a gentle tartness that balances everything perfectly.
This filling is simple to prepare and works beautifully in any pie crust. The fruit is tossed with a little sugar, a hint of cinnamon, and a touch of cornflour to thicken the juices as it bakes. The result is a filling that is rich, flavorful, and never runny.
For the filling:
- 3 medium apples (about 450g), peeled, cored, and sliced
- 3 medium pears (about 450g), peeled, cored, and sliced
- 250g (about 2 cups) fresh or frozen blackberries
- 100g (½ cup) granulated sugar (adjust to taste)
- 1 teaspoon ground cinnamon
- ½ teaspoon ground nutmeg (optional)
- 2 tablespoons cornflour
- 1 tablespoon lemon juice
- 1 teaspoon vanilla extract
Method:
In a large bowl, combine the sliced apples, pears, and blackberries. Add the sugar, cinnamon, nutmeg (if using), corn flour, lemon juice, and vanilla. Toss gently until the fruit is evenly coated. Set aside while you prepare the crust.

The crust – flaky, buttery, and ready for decoration
A good pie crust is the foundation of any beautiful pie. It needs to be sturdy enough to hold its shape when cut into decorative pieces, but tender and flaky when baked. An all-butter crust is ideal for this – it holds its shape beautifully, making it perfect for cutouts and beautiful fall pie decorations.
This recipe makes enough for a double crust – one for the bottom and one for the top decorations.
For the crust:
- 2 ½ cups all-purpose flour
- 1 teaspoon salt
- 1 tablespoon granulated sugar
- 230g (1 cup) cold unsalted butter, cut into small cubes
- 6-8 tablespoons ice water
- 1 tablespoon apple cider vinegar (optional, helps with tenderness)
Method:
In a large bowl, whisk together the flour, salt, and sugar. Add the cold butter cubes and cut them into the flour using a pastry blender or your fingertips until the mixture resembles coarse crumbs with some pea-sized butter pieces remaining.
Sprinkle the ice water and vinegar over the mixture, one tablespoon at a time, and gently mix with a fork until the dough just comes together. Do not overwork it. Divide the dough into two discs, wrap each in plastic wrap, and refrigerate for at least one hour.
How to create leaf and floral pie decorations
This is where the magic happens. Decorating a pie with cookie cutter shapes is surprisingly simple, and the results are stunning. With just a few tools, you can create beautiful fall pie decorations that look like they came from a bakery.
Step one – roll out your dough. On a lightly floured surface, roll out one disc of dough to about ⅛-inch thickness. Use this for the bottom crust. Roll out the second disc to the same thickness for your decorative cutouts.
Step two – cut your shapes. Use leaf-shaped and flower-shaped cookie cutters to cut out shapes from the second rolled-out dough. Small cutters, about 1 to 2 inches in size, work best for pie decorations. You can use a variety of sizes for a more organic look.
Step three – add detail. For a more realistic look, use a paring knife to lightly score veins onto the leaf cutouts before placing them on the pie. This small extra step makes a big difference and results in even more beautiful fall pie decorations.
Step four – arrange on the pie. Fill your pie with the fruit mixture. Then, gently place the cut-out leaves and flowers onto the top of the pie, arranging them in a decorative pattern. You can overlap them slightly, starting from the outer rim and working inward. Brush the back of each piece with a little water to help it stick.
Step five – egg wash and bake. In a small bowl, whisk together one beaten egg with a teaspoon of water. Brush the egg wash over the entire pie crust and the decorative pieces. This will give your pie a beautiful golden, shiny finish. Bake according to your pie recipe’s instructions.

Tips for perfect pie decorations
Keep the dough cold. If the dough becomes too soft while you are working, refrigerate it for a few minutes. Cold dough holds its shape much better and helps maintain your beautiful fall pie decorations.
Use a variety of cutters. Different sizes and shapes of leaf and flower cutters create a more natural, organic look. You can also use small round cutters for berries or tiny hearts for a whimsical touch.
Don’t forget the edge. You can also use cookie cutters to decorate the edge of your pie crust. Press small leaf or flower shapes around the rim for an extra-special finish.
Bake extra decorations. Cut and bake a few extra pieces of pastry on a separate baking sheet. They can be used to fill any gaps or decorate the center of the pie after it has finished baking.
A quiet invitation
A beautifully decorated pie is more than just dessert. It is a gift – to yourself, to your family, to anyone who sits at your table. It is a way of saying that this meal matters, that this moment is worth savoring. And with a few simple tools and a little patience, beautiful fall pie decorations are within reach of every home baker.
This week, I invite you to try your hand at a decorated fall pie. Choose your favorite fruit, roll out some dough, and let your creativity guide you. The leaves do not have to be perfect. The flowers do not have to be symmetrical. They just have to be yours.
Save this post for your next fall baking day. 📌
👇 What is your favorite fruit combination for a fall pie? Share in the comments below or tag me on Instagram @sophiasquietcottage.


Leave a Reply