
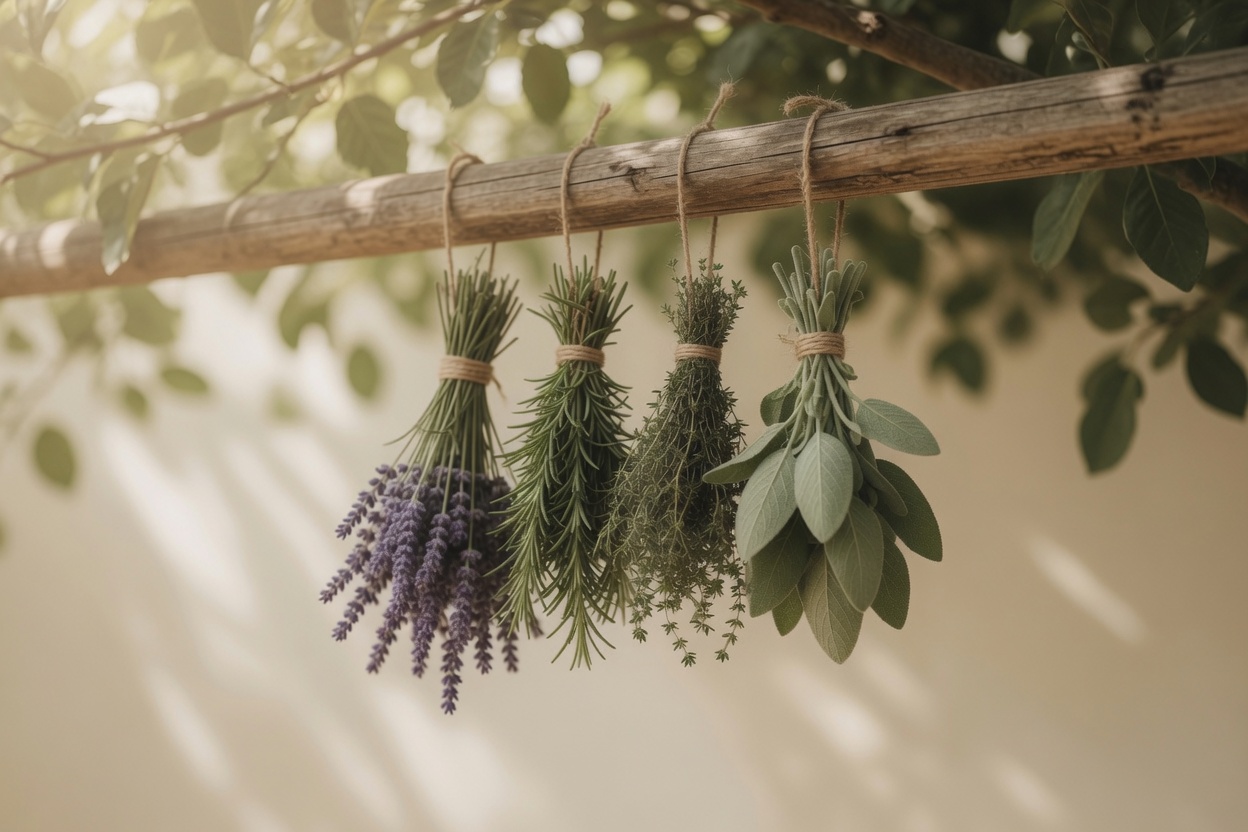
There is a small window in June when the garden is at its most generous. The lavender buds are full but not yet open, the rosemary is thick and fragrant, and the thyme is covered in tiny leaves that hold the warmth of the sun. This is the moment to capture it all, and making dried herb bundles from the June garden is the most beautiful way to do it.
Drying herbs is one of the oldest and simplest ways to preserve a garden’s abundance. Long before dehydrators and freezers, people hung bundles of herbs from their kitchen rafters to carry the taste and scent of summer through the darker months. It is a slow, satisfying practice that connects us to that tradition in the most gentle way.
The process itself is almost meditative. You walk through the garden with a pair of snips, choosing the best stems. You gather them into small bundles, tie them with twine, and hang them in a quiet corner. This is the heart of making dried herb bundles from the June garden – a slow, satisfying practice that connects you to the rhythm of the season.
Best of all, the herbs you dry from your own garden will always taste better than anything you can buy. They carry the memory of the soil they grew in, the rain that fell on them, and the hands that tended them. That is a flavor no store‑bought packet can replicate.
Why dry your own herbs?
Drying herbs is not just about preserving food. It is about making the most of what you have grown, reducing waste, and creating something beautiful for your home.
When you dry your own herbs, you control exactly when they are harvested and how they are treated. This means you get the strongest possible flavor and fragrance. You also save money, avoid plastic packaging, and have a supply of your favorite herbs ready whenever you need them.
Dried herbs also make wonderful gifts. A bundle of lavender tied with twine, a small jar of dried rosemary, or a little sachet of thyme and sage – these are thoughtful, handmade presents that come straight from your garden
And there is something deeply satisfying about opening a jar in the middle of winter and smelling the summer garden you preserved months before.
If you don’t grow your own herbs yet, here is a very helpful and simple guide, how to start your dream garden.
The best herbs to dry from your June garden
Not all herbs dry equally well. Some hold their flavor and color beautifully, while others fade or become bitter. The following herbs are all excellent choices for drying and will reward you with months of fragrance and flavor.
Lavender is a joy to dry. Its strong, woody stems hold their shape well, and the dried buds keep their scent for months. Harvest when the buds are full but before the flowers fully open. Use dried lavender in teas, baking, sachets, or simply as a beautiful dried arrangement.
Rosemary is one of the easiest herbs to dry. Its sturdy stems and tough, resinous leaves mean it dries quickly and holds its flavor beautifully. Use dried rosemary in roasted vegetables, breads, soups, or infused oils.
Thyme has tiny leaves that dry well and retain their earthy, savory flavor. Harvest just before the flowers open for the strongest taste. Use dried thyme in stews, sauces, marinades, or herbal teas.
Sage is another excellent choice. Its velvety leaves dry to a beautiful grey‑green and keep their distinctive flavour for months. Use dried sage in stuffings, roasted meats, or browned butter sauces.
Mint can also be dried, though its leaves are more tender and need careful handling. Hang small, loose bundles in a warm, dark place and check regularly for mould. Use dried mint in teas, summer drinks, or potpourri.
Oregano and marjoram both dry beautifully. Their small, sturdy leaves hold their flavor well and are perfect for Italian and Mediterranean cooking.
When and how to harvest
The timing of your harvest makes a real difference to the quality of your dried herbs.
The best time of day to harvest is mid‑morning, after the dew has evaporated but before the heat of the day sets in. This is when the essential oils in the leaves are at their most concentrated, giving you the strongest flavour and fragrance.
The best stage of growth depends on the herb. For leafy herbs like rosemary, thyme, and sage, harvest just before they flower. The leaves are at their most flavourful at this point. For lavender, harvest when the buds are full and colourful but not yet fully open. The buds will hold their scent better than fully open flowers.
How much to harvest depends on your needs. For drying, cut stems that are long enough to tie into bundles – around 10‑15 cm (4‑6 inches) is ideal. Leave enough growth on the plant for it to regrow. A good rule is to take no more than a third of the plant at any one time.
A gentle note: Always use clean, sharp snips or secateurs. Avoid cutting into woody, leafless branches. And if you are harvesting from a plant that has been treated with any chemicals, be sure to wash the herbs thoroughly before drying.
How to make your dried herb bundles

Making the bundles is the most satisfying part of the process. It is simple, hands‑on, and deeply rewarding.
Step 1: Gather your stems. Choose healthy, undamaged stems with no yellowed leaves or signs of disease. For a good bundle, you will need about 5‑10 stems. If the stems are very thick, you may want fewer. If they are thin and delicate, you can use a few more.
Step 2: Remove the lower leaves. Strip the leaves from the bottom inch and a half of each steM. This leaves a clean, bare section of stem that you can tie together easily.
Step 3: Bundle the stems. Gather the stems together in a small, loose bunch. Make sure the bundle is not too tight – air needs to circulate freely between the stems to prevent mould. A good bundle is about 1‑2 inches thick at the base.
Step 4: Tie with twine. Use natural twine, cotton string, or raffia to tie the bundle securely just below the stripped section of the stems. Tie a simple knot or a slipknot. If you use a rubber band, it will tighten as the stems shrink, which can be helpful. But twine is more traditional and just as effective if tied firmly.
Step 5: Create a hanging loop. Leave a length of twine at the top to create a loop for hanging. This makes it easy to suspend the bundle from a hook, a nail, or a clothes hanger.
Step 6: Label your bundle. If you are drying several different herbs, attach a small label to each bundle. This will save you from confusing thyme with oregano later.
Where to hang your bundles
The place you choose to dry your herbs matters almost as much as the herbs themselves.
Look for a spot that is:
- Warm – ideally around 20‑24°C (70‑75°F)
- Dry – low humidity is essential to prevent mould
- Dark – direct sunlight can fade the colour and weaken the flavour
- Well‑ventilated – good airflow is crucial for even drying
Good places to try: A spare room, a warm cupboard, an airing cupboard, or a sheltered corner of the kitchen. Some people hang their bundles from a wooden clothes hanger or an old coat rack. Others use a simple hook or nail in the ceiling.
A practical tip: If you are worried about dust or falling leaves, you can slip each bundle into a small paper bag with a few holes poked in it. This protects the herbs while still allowing air to circulate.
How long does it take?
Most herbs take about 1 to 2 weeks to dry completely. The exact time depends on the herb, the size of the bundle, and the conditions in your drying spot.
You will know your herbs are ready when:
- The leaves are crisp and brittle, like cornflakes
- The stems snap cleanly when bent
- The leaves crumble easily when rubbed between your fingers
If the stems are still flexible or the leaves feel leathery, they need more time. Be patient. Rushing the process can lead to mould or loss of flavour.
How to store your dried herbs
Once your herbs are fully dry, it is time to store them properly.
Strip the leaves. Hold the bundle over a clean bowl or sheet of paper. Gently run your fingers down the stems to release the dried leaves. For lavender, you can also gently rub the buds off the stems.
Discard the stems. The stems have very little flavour and can be composted.
Store in airtight containers. Glass jars with tight‑fitting lids are ideal. They keep out moisture, light, and air, all of which can degrade the quality of your herbs.
Label and date. Write the name of the herb and the date you dried it on each jar. Dried herbs are best used within a year. After that, they begin to lose their flavour and fragrance.
Keep in a dark, cool place. A cupboard or pantry is perfect. Avoid storing herbs near the stove or in direct sunlight.
How to use your dried herbs
Once you have your beautiful jars of dried herbs, the possibilities are endless.
In the kitchen: Use dried herbs in cooking, just remember that dried herbs are about four times stronger than fresh. Start with a smaller amount and add more to taste. Rosemary is wonderful in roasted vegetables and breads. Thyme is perfect in stews and soups. Sage adds depth to stuffings and sauces. Lavender can be used in baking – try a teaspoon in shortbread or cakes.
In teas: Dried chamomile, mint, lavender, and lemon balm all make lovely herbal teas. Simply pour boiling water over a teaspoon of dried herbs and steep for 5‑7 minutes.
In the home: Dried lavender and rosemary can be used in sachets for drawers and cupboards They repel moths and keep your linen smelling fresh. You can also make potpourri, simmer pots, or dried wreaths.
As gifts: Small jars of dried herbs tied with twine and a handwritten label make beautiful, thoughtful presents.

A quiet invitation
Making dried herb bundles from the June garden is one of those small, slow practices that feels like magic. You take something fresh and alive, you hang it in a quiet corner, and you wait. And when you finally open that jar in the middle of winter, the scent of summer comes rushing back.
This week, I invite you to step into your garden with a pair of snips and a length of twine. Gather a few stems of whatever is growing well. Make a small bundle and hang it somewhere you will see it every day. Let it be a quiet reminder that the garden is always generous, and that the best things in life are often the simplest.
Save this post for your next garden harvest. 📌
👇 What is your favorite herb to dry from your garden? Share in the comments below or tag me on Instagram @sophiasquietcottage.


