
Waxed cloth has reappeared in my kitchen not as a retro relic, but as a very useful object. Each time I press the warmth of my palm against a bowl of leftover soup wrapped in my homemade cloth, I hear the satisfying crinkle of a simple, profound swap. Creating my own DIY beeswax wraps and bread bags has become one of the most rewarding rituals in our slow home. It is a small, tangible act of stepping away from single-use plastics and toward a kitchen that feels simpler, more natural, and deeply intentional.
Let me walk you through why I have fallen in love with this project, the materials you will need, the little secrets that make all the difference, and how these beautiful cloths have found a home in our daily life. My hope is that by the end, you will be ready to make your own.
Why make the swap?
For a long time, I felt a quiet guilt every time I tore off a sheet of plastic cling film. It was a single-use convenience that felt increasingly hard to justify. I knew there had to be a better way, and I found it in a jar of beeswax and a piece of old cotton.
Making your own DIY beeswax wraps and bread bags means you are choosing a plastic-free, reusable alternative that is kind to both your food and the planet. Unlike plastic wrap which can leach chemicals and takes hundreds of years to break down, beeswax wraps are made from natural, biodegradable ingredients. Because they are reusable, one wrap can eliminate dozens or even hundreds of metres of cling film over its life.
Beyond the environmental benefits, these wraps are simply wonderful to use in a slow kitchen. The beeswax has natural antimicrobial properties, and the fabric is breathable, which means your vegetables stay crisp and your bread crusts remain perfectly crusty, never trapped in a sweaty plastic tomb. It is a small piece of kitchen alchemy that just works.
Gathering your materials
Before you begin, it is helpful to gather everything you need. The beauty of this project is its simplicity.
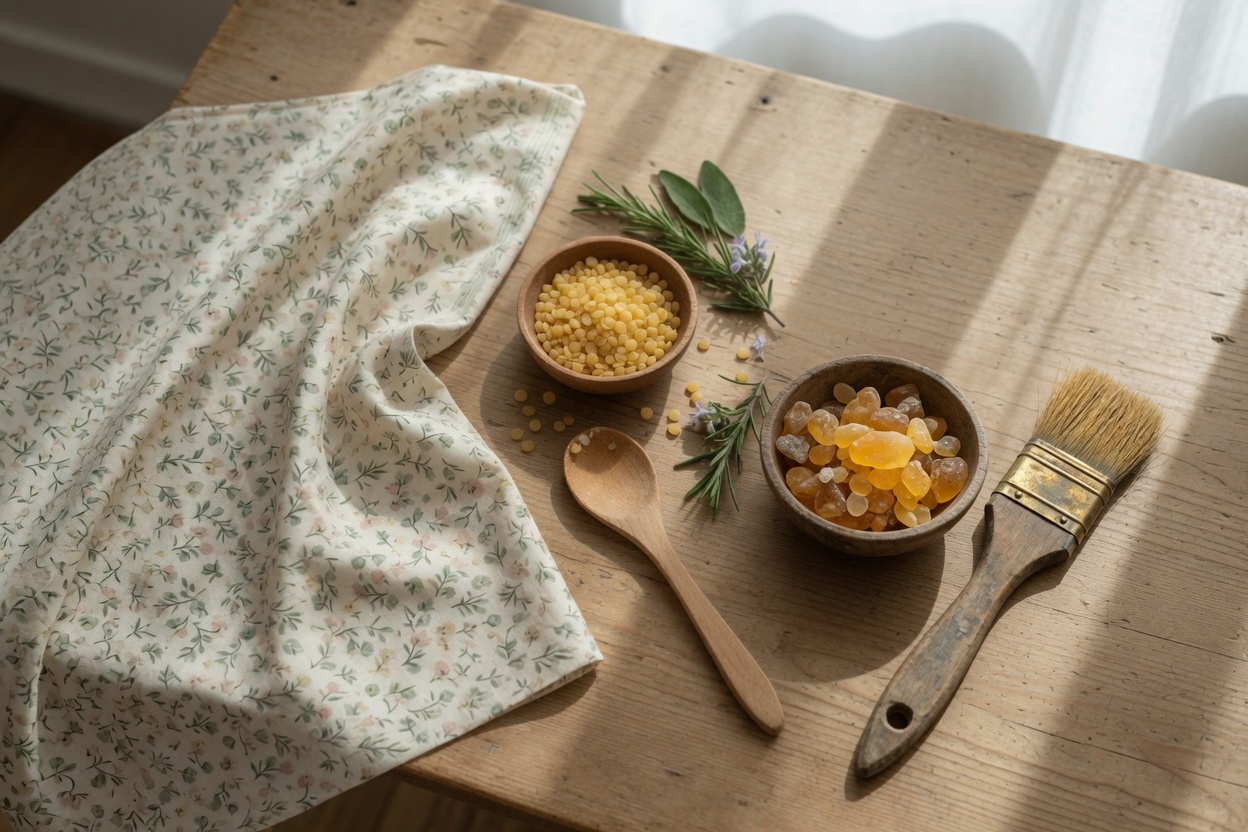
- Fabric: 100% cotton is essential. Look for lightweight cotton, old tea towels, or even a fun thrifted bedsheet. Avoid fabrics with a tight, synthetic weave as they will not absorb the wax properly.
- Beeswax: You can use pastilles (pellets) for convenience or grate a block of pure, natural beeswax. Locally sourced beeswax is a lovely touch.
- Pine resin (optional but wonderful), 1/3 weight of beeswax: This sticky, golden sap helps the wrap cling to bowls and mould around food. It is the secret ingredient for a truly effective wrap.
- Jojoba oil: Just a tablespoon or two helps keep the wax pliable and prevents cracking. It also adds a lovely, subtle scent.
- Tools: You will need parchment paper (not wax paper), a baking sheet, an oven, saucepan, double boiler, scissors (pinking shears are great for preventing fraying), a paintbrush for spreading the wax, and a ruler.
This simple list is all you need to get started on your first set of DIY beeswax wraps and bread bags. I love that so many of the materials can be found around the house or inexpensively online.
The simple art of making

The process of making the wraps is as soothing as the outcome. There is a meditative quality to watching the wax melt and infuse into the fabric. The oven method is wonderfully straightforward:
- Prep your fabric: Wash and dry your fabric. Then, cut it into the sizes you will use most. I love having a few small squares for covering ramekins, a medium wrap for a bowl of leftovers, and a large rectangle for a loaf of bread.
- Set the stage: Preheat your oven to its lowest setting, around 85-100°C (185-210°F). Line a baking sheet with parchment paper and lay your fabric flat on top.
- Place pine resin, beeswax, and jojoba oil in a double boiler or glass measuring cup and set in a saucepan. Turn burn to medium-high heat. Add water to saucepan until the mixture inside the double boiler or measuring cup is below waterline.
- Allow ingredients to melt and mix together.
- Brush mixture lightly onto fabric. Don’t add too much at first. If you cover the fabric to thick, the wrap will be stiff. So remember that it’s easier to add more than take the excess away. When you are applying wax mixture to the bread bag, don’t forget to saturate seams really well.
- Melt and spread: Place the baking sheet in the oven. In a few minutes the wax will melt. Carefully remove the sheet and use a paintbrush to gently spread the melted wax so it soaks evenly into the fabric.
- Set and cure: If you are making a bread bag, add a piece of parchment paper in the middle of the bag, or use wooden dowels, to separate the sides of the bag, until the wax cools off. Let the wrap or a bread bag cool on the parchment paper. It will harden quickly. Once cool, you can peel it off. Your very own wrap is ready.

And just like that, you have made your very own DIY beeswax wraps and bread bags. The whole process takes less than half an hour, and the result is far more satisfying than anything you could buy.
💡 Small details, big difference
Over time, I have learned a few little secrets that make the process even smoother and the results more enjoyable.
- Cut with pinking shears: These zigzag scissors help prevent the edges of your fabric from fraying over time. It is a small step that keeps your wraps looking neat.
- Work quickly: The wax mixture begins to harden as soon as it comes out of the oven. Have your brush ready and work swiftly to spread it evenly.
- The iron method: If you do not want to use the oven, you can sandwich your wax-covered fabric between two sheets of parchment paper and use a warm iron to melt and spread the wax. This is a quicker method that works beautifully for small touch-ups.
- The pine resin difference: Adding pine resin to your mixture really does make the wraps stickier and more effective. If your first batch does not cling perfectly, try adding a bit more resin next time.
These small nuances are what transforms a good craft project into a beloved kitchen tool.
🧺 A home for every use
Since I started using these wraps, I have discovered dozens of ways they simplify my daily rhythm. They have truly become a staple in my cottage kitchen.
- Covering bowls: Whether it is a bowl of salad greens, some leftover stew, or a batch of dough rising, a large wrap is the perfect, reusable lid.
- Wrapping vegetables: Carrots, celery, and bell peppers stay crisp and fresh when loosely wrapped in a beeswax cloth instead of a plastic bag.
- Storing bread and cheese: This is where they truly shine. A beeswax bread bag keeps a loaf of sourdough fresh for days without sacrificing its beautiful, crusty exterior. It is the same for a wedge of cheese; the wrap allows it to breathe while preventing it from drying out.
- Packing a snack: Instead of disposable baggies, I wrap a sandwich or a handful of crackers in a small cloth for a waste-free lunch.
Because each cloth is reusable, one small set of my DIY beeswax wraps and bread bags often lasts for 6 to 12 months before needing a refresh. And refreshing them is simply a matter of popping them back in a low oven to remelt and redistribute the wax coating. They are a gift that keeps on giving.
Caring for your wraps
Looking after your wraps is as simple as using them. After each use, rinse the cloth in cool water with a drop of mild, alcohol-free soap. Never use hot water, as it will melt the wax. Then, let it air-dry before folding it and putting it away. Avoid contact with raw meat, hot dishes, or the microwave, as excessive heat is the only real enemy of the wax. With this gentle care, your wraps will be a faithful kitchen companion for many months.
💛 A quiet invitation
There is a profound satisfaction in reaching into a drawer and pulling out something you have made with your own hands. It brings an unexpected warmth and a deeper sense of connection to the simple acts of storing and preparing food. Creating your own DIY beeswax wraps and bread bags is an affordable, creative way to welcome more sustainability into your home without the pressure of being perfect. It is a gentle practice in slowness, one that reduces waste and fills your kitchen with natural, lovely things.
I hope you will try this simple project. It has brought such a quiet joy to my kitchen, and I believe it could do the same for yours.
Save this post for a weekend afternoon when you have half an hour to create. 📌
👇 I would love to know, have you ever made your own beeswax wraps? What do you plan to wrap first? Share in the comments below or tag me on Instagram @sophiasquietcottage.


